Aweber Lists For Your Business

When it comes to making money online, if you don’t have a “List”, you don’t have a business. That’s why it’s so inexplicable that so many online would-be entrepreneurs put off creating a list for months – sometimes even years without realizing that having a list of people who are interested in your topic, product or service is a must have for building your business.
Your list of email subscribers gives you permission to contact people in exchange for an irresistible incentive they can get from you for free, if they part with their contact information.
There are many companies who provide list building services: Constant Contact, MailChimp, Aweber, and CRM’s like Infusionsoft. Having used them all, I have a favorite based on all the marketing features and training available: Aweber.
Setting up a list with Aweber can feel overwhelming; and, is easier than you might think. To take any secret fear factor out of creating that all-important first list, just be aware that you can set it up in advance without having a single subscriber. Just create it and leave it sitting on Aweber until you are ready to release the URL of your landing page and web contact form to the world.
Don’t leave it sitting too long, however! If you take advantage of that “first-month-for-$1.00” trial by making your list work for you, you will have your next month’s $19.00 earned (and more) by the time your first payment rolls around.

But first things first: Let’s focus on simply creating that list…
Step 1. What You Need to Know
Knowing what you are getting into can often make performing a new process for the first time less confusing. In this guide, we are going to set up a new list in Aweber and create a “double opt-in” Confirmation email. The wonderful thing about Aweber is that it does so much of the work for you – such as providing information in every email detailing how your subscriber can unsubscribe (which you have to provide, by law).
When you create your first email, Aweber automatically adds your name, the mailing address you provided, plus a link to unsubscribing or changing subscription options at the very bottom of every email it sends out for you.

Open it. This email contains your login details and your temporary password.
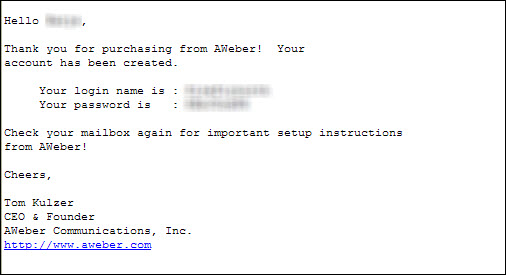
Return to your open Aweber browser page, and click the “sign in” link.

You have two choices:
- Click on “My Account” to change your Password, add a security question or add any other details you wish. (Note: You can do this later.)
![]()
- IGNORE the big green “Continue to your Account” button. Instead, click on the “Create A List” button.
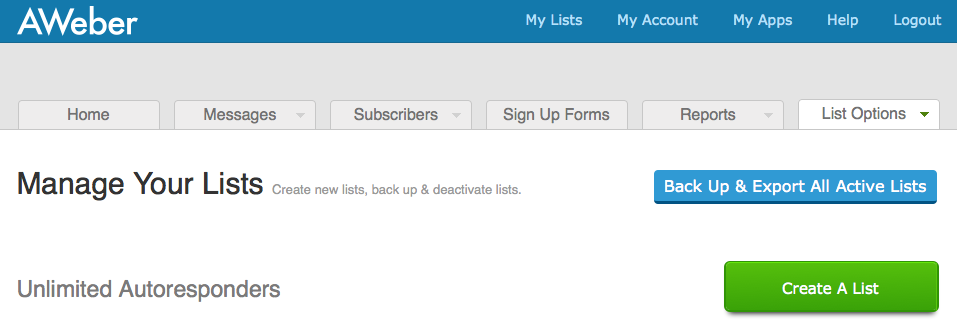
Next, replace the default list name with your new list name.
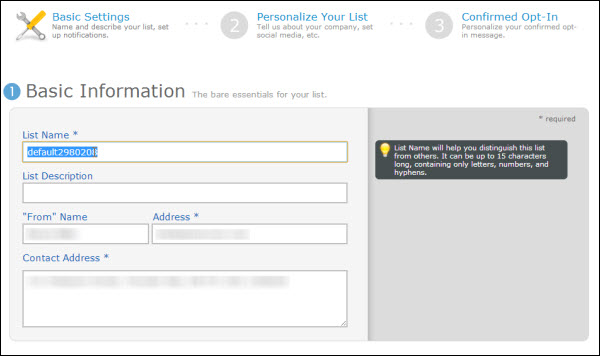
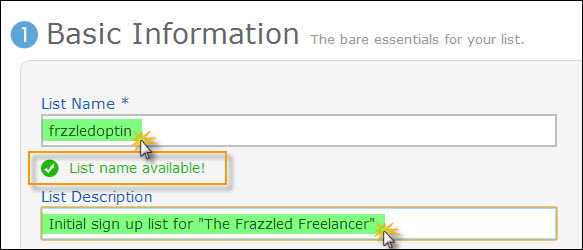
Let’s say we are going to create a list for your business “The Frazzled Freelancer”. Let’s create a list called “frzzledoptin”, which stays within the 15-character limit Aweber sets on list names: Replace the default list name with “frzzledoptin” and add a description that will help you remember what this list is for.
Enter your “From” address. This is what your subscribers will see, when they look at your emails in their inboxes, so make sure you identify yourself clearly. This will make your emails stand out in any email crowd – and help your subscriber remember:
- Who you are
- What business you are connected with
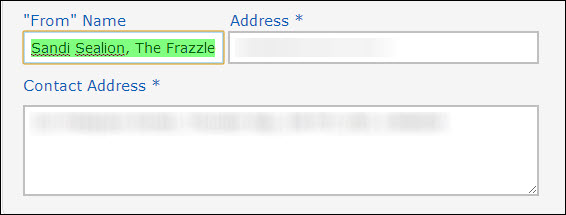
For example, if you perform the above action, when people receive an email from your new list, the “From” line will appear like this:
![]()
Including both your name and your business name (or newsletter title, tagline, etc.) will help your new subscriber instantly “place” you in her memory, whenever she receives an email from your list.
Just using your name is often not enough. Your subscriber is more apt to say: “WHO the heck is Tammy Exploda? Never heard of her – must be spam.”
Why you should always use a unique email address originating from your domain:
The email address that you specify as your contact address should be exclusive to and originate from your business domain – not from a “public” address such as yahoo.com, gmail.com or live.ca.
(Spam filters often automatically trash emails from public addresses – and so do subscribers who don’t remembering signing up! That public address often shakes the trust factor and sets the seal on the decision to delete.)
In section #2, Notifications, provide your own main, private email address and name, if you want to be notified any time someone joins your list. (Don’t worry: Your subscribers won’t see this.)
Note that enabling Notifications also allows people to leave you feedback or a comment when they unsubscribe. And that can be incredibly valuable information on what you’re doing wrong; and whether or not the “unsubscribe” has anything to do with you at all.
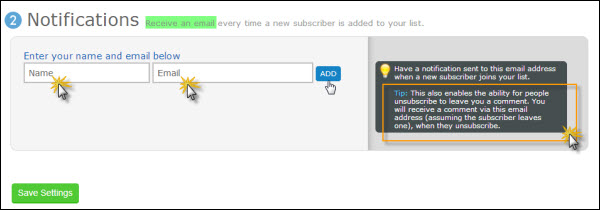
Save your Settings. Do this at the end of every page or (when prompted) after every section on a page.

Your brand new list, “Frzzledoptin”, is now created.
Step 2. Personalizing Your List
The next section allows you to perform three important functions in cementing your Company’s web presence.
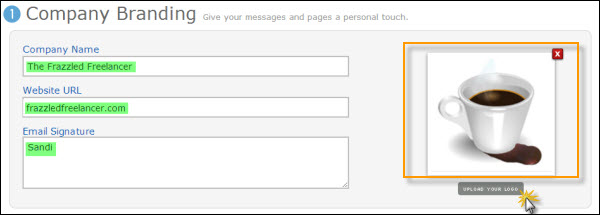
In section #1, Company Branding, brand your company by entering its unique Name, URL and the signature you want people to see. Upload your Logo too.
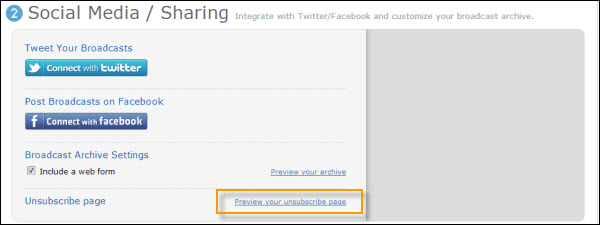
In section #2, Social Media/Sharing, set up social sharing and preview your Unsubscribe page.

In section #3, Global Text Snippets, you can assign these handy text cues.
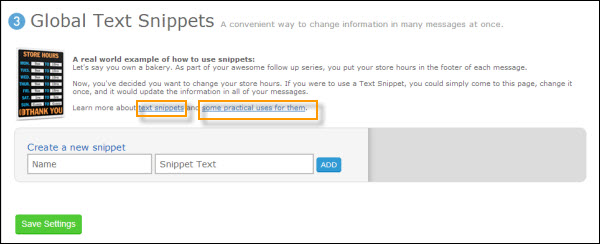
Global text snippets allow you to mark text to be globally replaced in multiple emails.
For example, if you regularly replace the code for a discount in different emails, you can designate the code text as a global snippet. This allows you to quickly replace an old discount code (e.g. “JULY”) with a new one (e.g. “AUGUST”).
For more about Global Text Snippets, access Aweber’s learn more anchor text. But for now, just skip it unless you really need this option.
Remember to Save Settings!
Step 3. Setting Up your Opt-In Email
If you are not taken to a new page after saving your settings, slide back up to the top of the Branding/Social sharing/Global Text Snippets page and select #3, “Confirmed Opt-In”.

You will be directed to the next page, which also has three sections.
Set up your confirmation message. Make this as straightforward as possible and don’t worry about sparkling with personality.
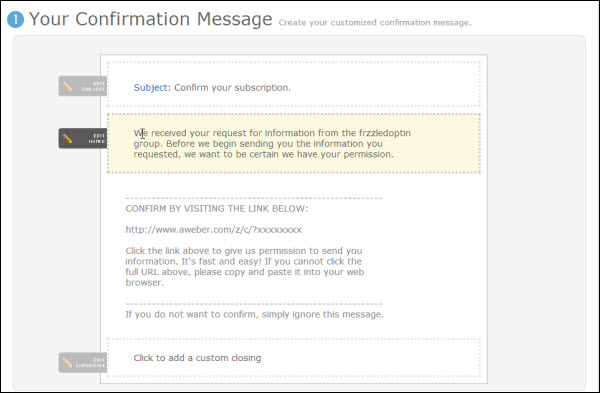
You can change any of the sections by clicking on the black edit button and pencil tab to the left of each field.
In fact, you can even the Subject line, “Confirm your subscription”. (Note: Aweber will automatically include the correct website link.)
Just type over the text in each section, and click to add a custom closing.
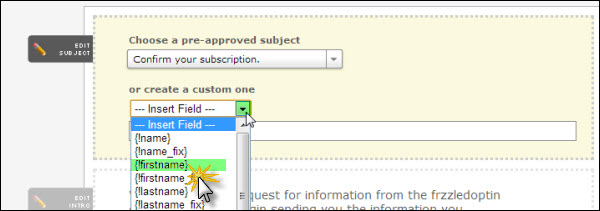
And notice how easy it is to add custom fields…
For example, if you select the {!firstname} or {!firstname_fix} field from the drop-down menu while editing your Subject section, subscriber Mary Johnston would see “Mary, confirm your subscription” instead of just “Confirm your subscription.”
One section you absolutely MUST customize is your “Edit Intro” section. You need to replace the list name that you and Aweber see (i.e. “frzzledoptin”) with your actual company or personal name that you want your subscribers to see.
So you would change default text “the frzzledoptin group” …

…to what you want your subscriber to see…

…in this case, The Frazzled Freelancer.
You can also add a custom “end” salutation and signature…

Step 4. Creating a Double Opt-In
While it’s a lovely idea just to send your subscriber straight to her download or keep it really simple and just add subscribers to your list, don’t do this. Keep the requirement setting “ON” in #2, Require Opt-In on Web Forms, so that your subscriber has to confirm her subscription.

The reason? Legal requirements under the CAN-SPAM act are strict, and if a subscriber forgets they chose to join your list (or doesn’t realize they are doing so when they enter contact info) you want to be able to prove they did, if that subscriber ever lays a complaint.
Finally, in #3, Success Page, enter the URL of the landing page your subscriber will be taken to, upon confirming.

Remember at every step to save your settings!

(Be sure to watch after each save for this icon giving you a “successfully saved” message.)
![]()
Share this article with these Tweetables:
• Setting up an Aweber list is as easy as 1-2-3 – Click to Tweet
• @SusanGilbert walks you through setting up an Aweber list for your business – Click to Tweet
• Get started with Aweber lists for increased sales – Click to Tweet


0 Comments