How Aweber Makes It Simple To Customize Emails
As blog owners, we are competing with so many other sites for the attention of our readers. And they are busy people. They simply don’t have the time to visit every day, even if they want to. Using the Blog Broadcast feature in Aweber allows you to send your readers an email when you’ve posted to your blog. Many people don’t know about or understand RSS feeds. The Blog Broadcast feature makes it simple for your readers to get your fresh content via email.
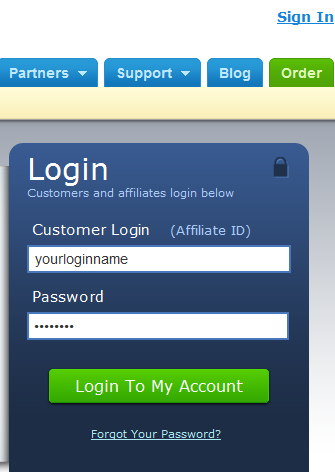
Step 1: Login to Aweber website
The first thing you need to do is login to your Aweber account.
Step 2: Create a Blog Broadcast
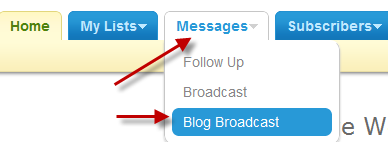
Navigate to the Blog Broadcast section of Aweber by hovering your mouse over “Messages” then clicking on “Blog Broadcast”.
Now, you will need to click on “Create A New Blog Broadcast”.

Enter the URL to your RSS feed and the Subject for your Blog Broadcast message.

Scroll down and type your message in the “Plain Text Message” section. Be sure to stay within the recommended width.

Choose the appropriate answer for the remaining options.
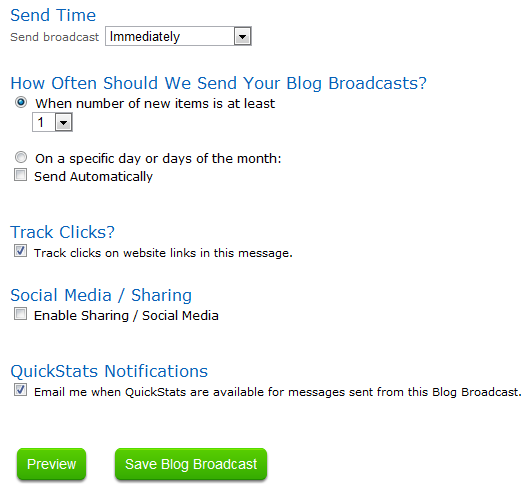
As expected, the “Send Time” drop-down box allows you to choose a time.
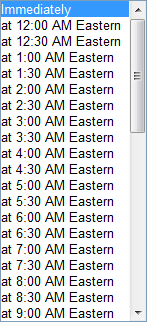
As you click various options, you’ll see what choices you have. For example, you could send your blog broadcast when there are at least 5 blog posts OR on every Monday.
When you are done, click on “Save Broadcast”. If you wish to preview the broadcast first, you can click on Preview before saving.

That’s all there is to it!
Next option within Aweber we’ll cover is about to set up your optin with the field you want (name, email and more).
Share this article with these Tweetables:
• A simple way to create a custom broadcast email with Aweber – Click to Tweet
• @SusanGilbert walks you through how to set up a custom broadcast email in Aweber – Click to Tweet
• Would you like to customize your Aweber emails? Here’s how – Click to Tweet


0 Comments